BEHIND THE SCENES
I have been designing and making jewelry for the past year and I wanted to share with you some of my tips. Here is a behind the scenes of the jewelry making process.
1. SKETCHING YOUR IDEAS
I often get ideas for designs at very random moments and find myself drawing on old notes. It doesn't matter where you keep your sketches as long as you have them to look back at later. Since my designs are inspired by my travels, I often look back through photos I’ve taken and see what aspects of it inspired me and try to capture those elements in my designs.


2. CARVING THE WAX MODEL
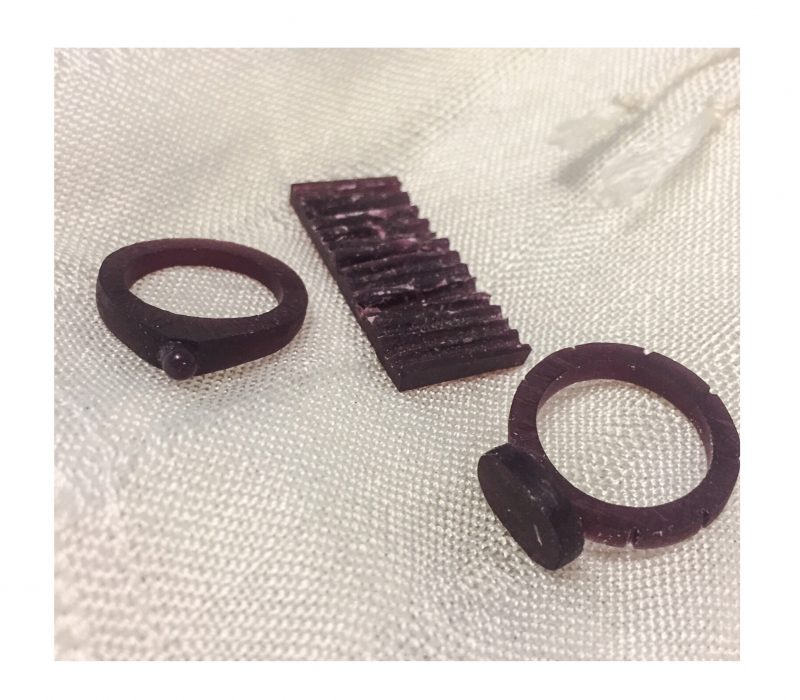
I use a purple wax when carving my designs. Often, the initial design in my head changes while carving. Thinner designs are more fragile and likely to break so I use a handheld wax melter to correct any mistakes. Once the carving is done, I sand the wax (240, 300, 400 and 600 grade) and get it ready for casting.
3. CASTING
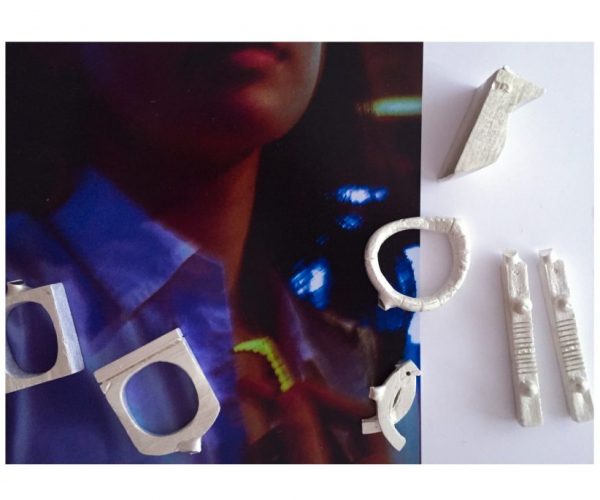
I took a course the lost-wax casting course at George Brown College and went through the process of casting my first design (the Defne ring from the Istanbul collection). However, the process itself is a little lengthy and because I don't currently work out of a studio, I drop off my wax models at a casting house. I ask for the piece to be cast in the metal I prefer (silver, brass, gold) and I also ask for a rubber mould. This mould will be useful for when you need to make multiples of the same piece.
Upon getting the piece back from the casting house, there is a bit of metal sticking out from each of the pieces. This is because a wax stem (called a sprue) is added to our wax models to allow the flow of the metal. The pieces, after casting, are also covered in oxidized metal which I remove with a coarse burr during the polishing stage.

4. POLISHING
To polish my pieces, I use a variety of tools. First I use a course burr on the Flex Shaft (THE machine you need to have to make your jewelry process much faster). After, I sand my pieces using various grades, from 200 (coarsest) to 3000 (finest). Finally to give it a shine, I polish with a grey and red compound using a muslin cloth wheel.
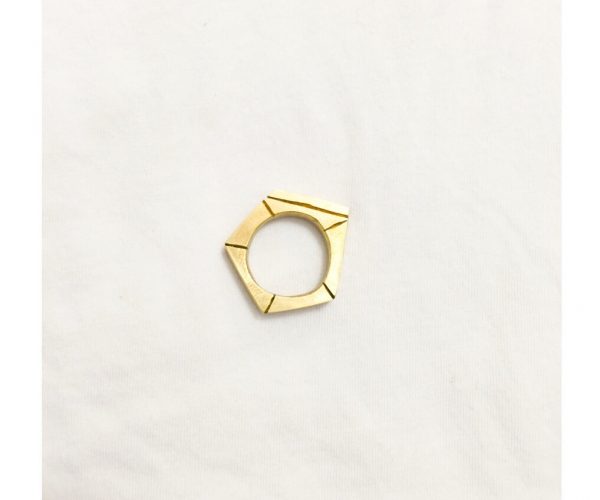
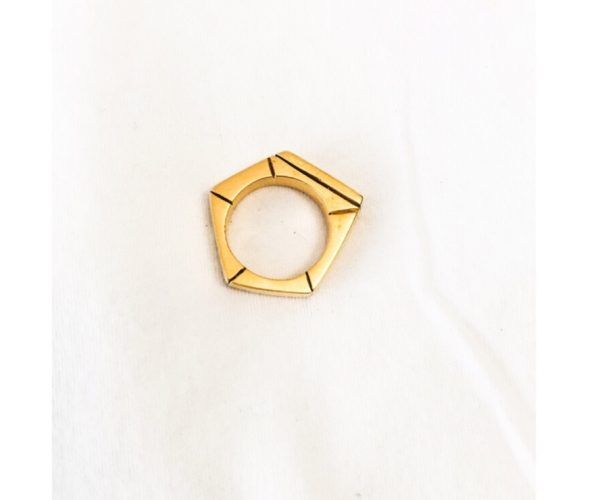
I want my pieces to be customizable for your tastes so I offer different types of polishes (shiny vs. matte) as well as gold plating. The photo on the left is a matte polish finish while the photo on the right has a more shiny finish and is also gold plated.